How to Perform Health checks in Kubernetes (K8s)
Kubernetes provides a health checking mechanism to verify if a container in a pod is working or not working

Health Checks source Thanks to (https://wideops.com/)
Kubernetes gives you three types of health checks performed by the kubelet. They are:
- Startup Probe
- Liveness Probe
- Readiness Probe
Startup Probe
Whenever we are dealing with physical/Legacy apps those may require extra startup time at first initialisation. In this cases we have a tendency to established a startup probe with constant command, protocol or TCP check, with a failureThreshold periodSeconds long enough to hide the more severe case startup time:
ports:
- name: liveness-port
  containerPort: 8080
  hostPort: 8080

livenessProbe:
  httpGet:
    path: /healthz
    port: liveness-port
  failureThreshold: 1
  periodSeconds: 10

startupProbe:
  httpGet:
    path: /healthz
    port: liveness-port
  failureThreshold: 30
  periodSeconds: 10
Liveness Probe
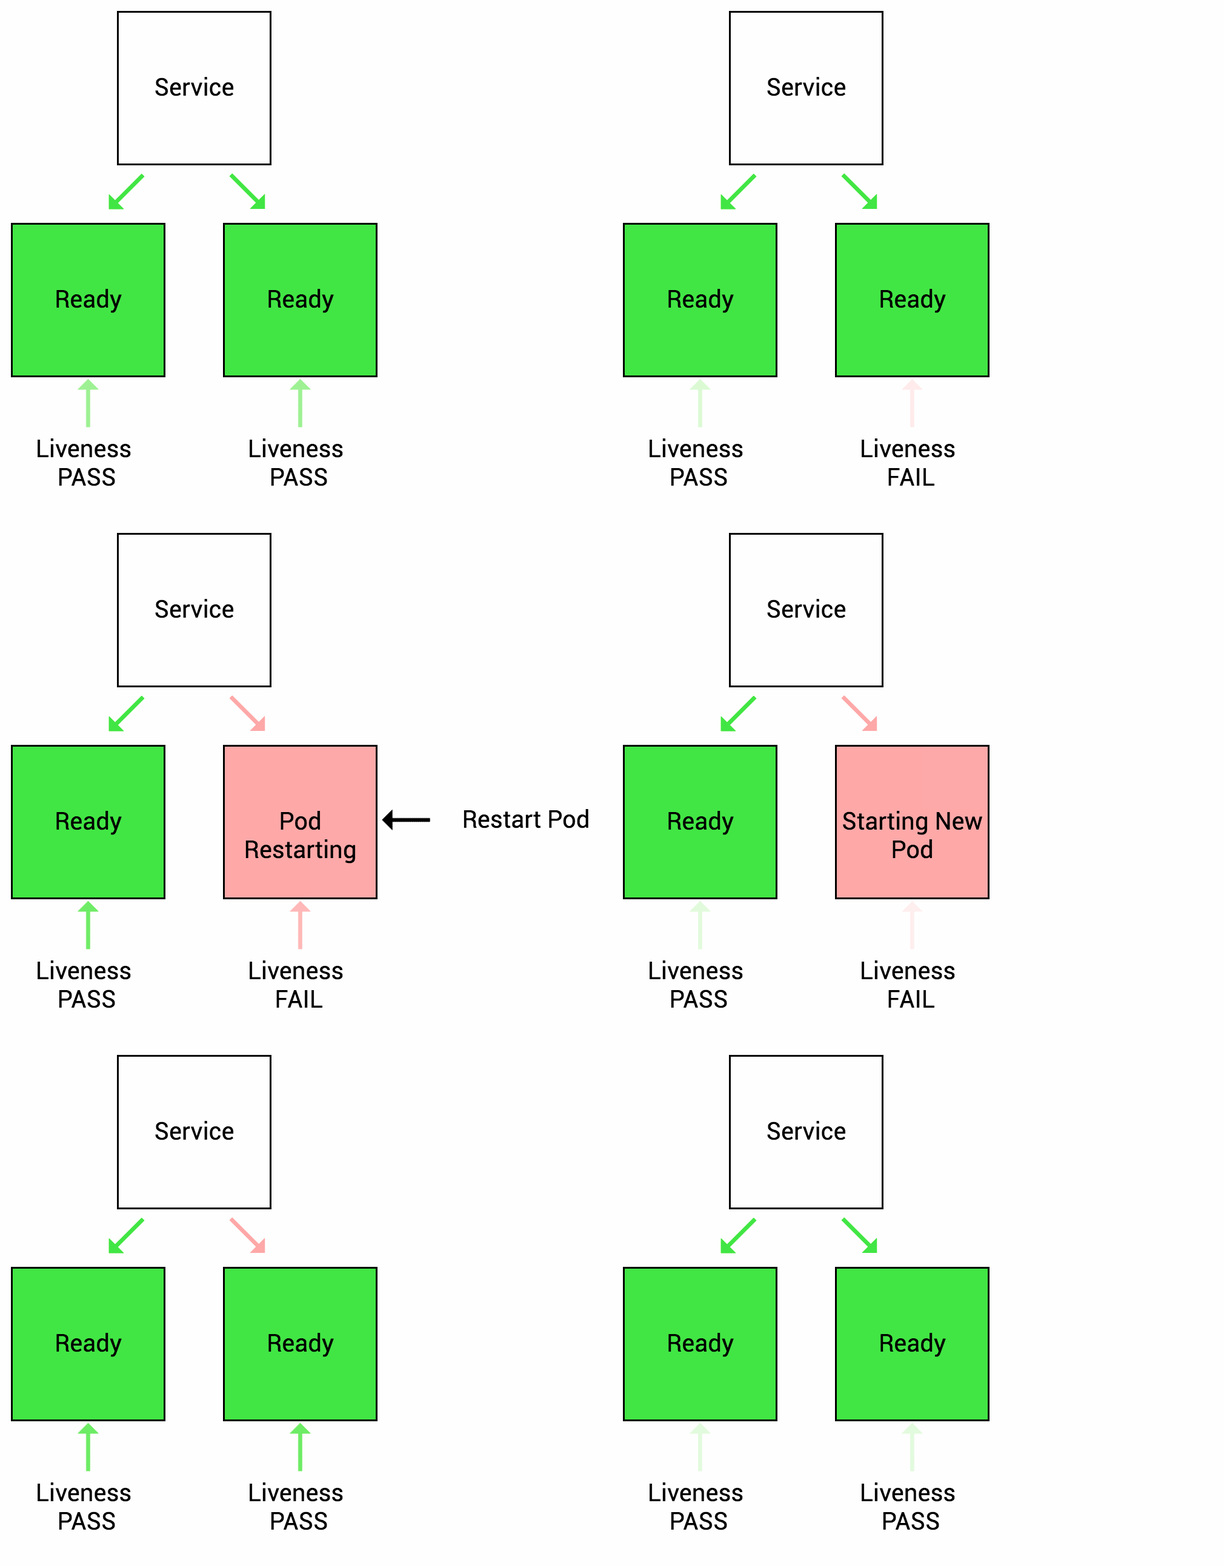
Liveness probe checks the status of the container (whether it is running or not). If livenessProbe fails, then automatically container move on with its restart policy

Liveness Probe source Thanks to (https://wideops.com/)
Readiness Probe
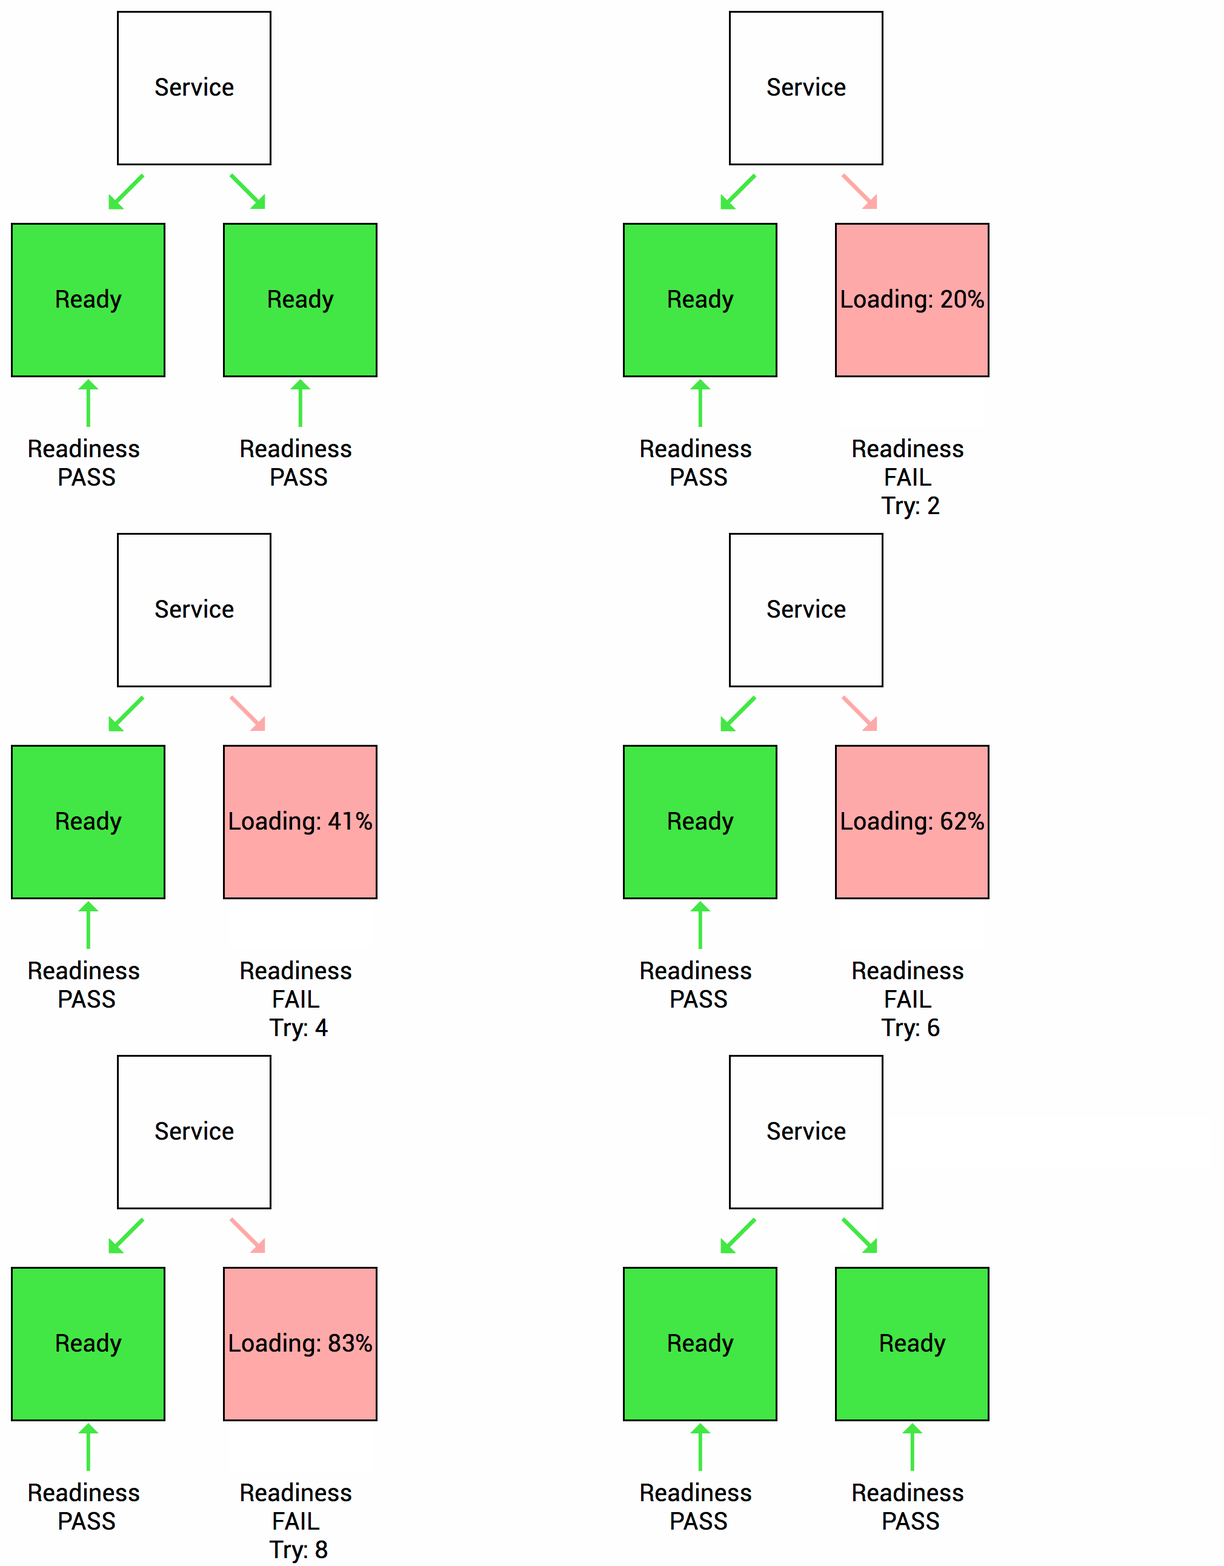
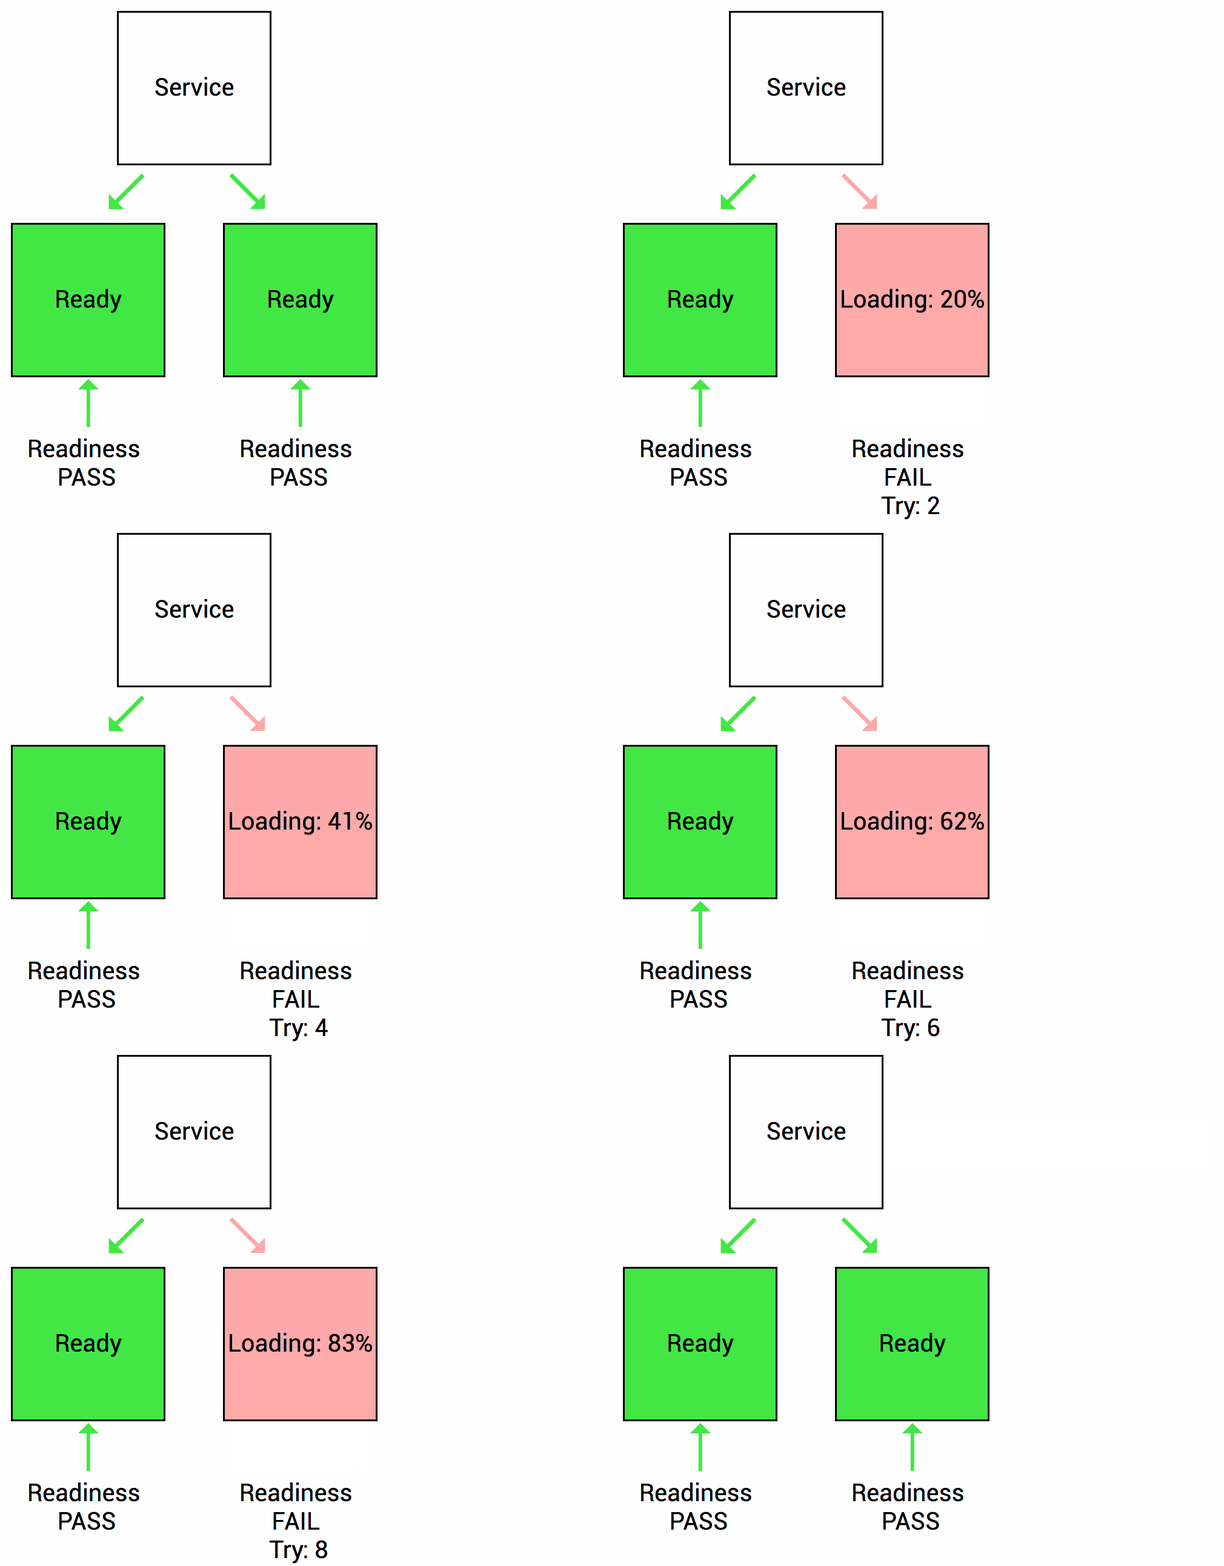
Readiness probe checks whether your application is ready to serve the requests. When the readiness probe fails, the pod’s IP is removed from the endpoint list of the service.

Readiness Healthcheck source Thanks to (https://wideops.com/)
There are three types of actions kubelet performs on a pod, which are:
- Executes a command inside the container
- Checks for a state of a particular port on the container
- Performs a GET request on container’s IP
Define a liveness command
livenessProbe:
  exec:
    command:
    - sh
    - /tmp/status_check.sh
  initialDelaySeconds: 10
  periodSeconds: 5
Define a liveness HTTP request
livenessProbe:
  httpGet:
    path: /health
    port: 8080
 initialDelaySeconds: 5
 periodSeconds: 3
Define a TCP liveness probe
---
initialDelaySeconds: 15
livenessProbe: ~
periodSeconds: 20
port: 8080
tcpSocket: ~
Readiness probes are configured similarly to liveness probes.
The only difference is that you use the readiness probe field instead of the liveness probe field.
Define readiness probe
---
command:
  - sh
  - /tmp/status_check.sh
exec: ~
initialDelaySeconds: 5
periodSeconds: 5
readinessProbe: ~
Configure Probes
Probes have a number of fields that you can use to more precisely control the behavior of liveness and readiness checks:
- initialDelaySeconds: Number of seconds after the container has started before liveness or readiness probes are initiated.
Defaults to 0 seconds. The minimum value is 0. - periodSeconds: How often (in seconds) to perform the probe.
Default to 10 seconds. The minimum value is 1. - timeoutSeconds: Number of seconds after which the probe times out.
Defaults to 1 second. The minimum value is 1. - successThreshold: Minimum consecutive successes for the probe to be considered successful after having failed.
Defaults to 1. Must be 1 for liveness. The minimum value is 1. - failureThreshold: Minimum consecutive fails for the probe to be considered restarting the container. In the case of readiness probe, the Pod will be marked Unready.
Defaults to 3. The minimum value is 1.
Nginx deployment
apiVersion: apps/v1
kind: Deployment
metadata:
  name: nginx-webserver
  labels:
    app: webserver
spec:
  replicas: 1
  template:
    metadata:
      labels:
        app: webserver
    spec:
      containers:
        - name: webserver
          image: nginx
          imagePullPolicy: Always
          ports:
            - containerPort: 80
          livenessProbe:
            httpGet:
              path: /
              port: 80
            initialDelaySeconds: 5
            periodSeconds: 3
          readinessProbe:
            httpGet:
              path: /
              port: 80
            initialDelaySeconds: 5
            periodSeconds: 3
httpGet have additional fields that can be set:
- path: Path to access on the HTTP server.
- port: Name or number of the port to access the container. The number must be in the range 1 to 65535.
- host: Hostname to connect to, defaults to the pod IP. You probably want to set “Host” in httpHeaders instead.
- httpHeaders: Custom headers to set in the request. HTTP allows repeated headers.
- scheme: Scheme to use for connecting to the host (HTTP or HTTPS). Defaults to HTTP.