Deploy a Dockerised Application on AWS ECS With Terraform
In this post, I will go through the process of deploying a Node app on AWS ECS with Terraform.
Overview
We will follow these steps:
- Create a simple Node app and run it locally.
- Dockerize the Node app.
- Create an image repository on AWS ECR and push the image.
- Create an AWS ECS cluster.
- Create an AWS ECS task.
- Create an AWS ECS service.
- Create a load balancer.
The technologies used in this guide are:
Amazon ECS— a fully managed container orchestration serviceAmazon ECR— a fully-managed Docker container registryTerraform— an open-source infrastructure as code tool
Prerequisites
- An AWS account
- Node installed
- Docker installed and some experience using it
- Terraform installed
Step 1 – Start your vagrant box
First, run the following commands to create and navigate to our application’s directory:
$ vagrant ssh master
vagrant@sivakumarvunnam:~$ mkdir node-docker-ecs
vagrant@sivakumarvunnam:~$ cd node-docker-ecs/
Next, create an npm project and Install Express:
vagrant@sivakumarvunnam:~/node-docker-ecs$ npm init --y
vagrant@sivakumarvunnam:~/node-docker-ecs$ npm install express
Create an index.js file with the following code:
const express = require('express')
const app = express()
const port = 3000

app.get('/', (req, res) => res.send('Hello, This is SivakumarVunnam!'))

app.listen(port, () => console.log(`Example app listening on port ${port}!`))
The app can then run with below command && You should see your app at http://localhost:3000/:
vagrant@sivakumarvunnam:~/node-docker-ecs$ node index.js
Step 2. Dockerize the Node App
Create a Dockerfile in your project directory and populate it with the following code:
# Use an official Node runtime as a parent image
FROM node:12.7.0-alpine

MAINTAINER sivakumarvunnam1@gmail.com

# Set the working directory to /app
WORKDIR '/app'

# Copy package.json to the working directory
COPY package.json .

# Install any needed packages specified in package.json
RUN yarn

# Copying the rest of the code to the working directory
COPY . .

# Make port 3000 available to the world outside this container
EXPOSE 3000

# Run index.js when the container launches
CMD ["node", "index.js"]
Step 3. Build and Push the Node App to AWS ECR
Now it is time build and we our container to a container registry service — in this case, we will use AWS ECR we will use terraform to create our repository. In your directory create a file called main.tf. Populate your file with the following commented code:
provider "aws" {
  region                  = "us-west-2"
  shared_credentials_file = "/home/vagrant/.aws/creds"
  profile                 = "default"
}

resource "aws_ecr_repository" "nodejs-app_ecr_repo" {
  name = "nodejs-app-ecr-repo"
}
Next, in your terminal, type:
terraform init
terraform plan
terraform apply
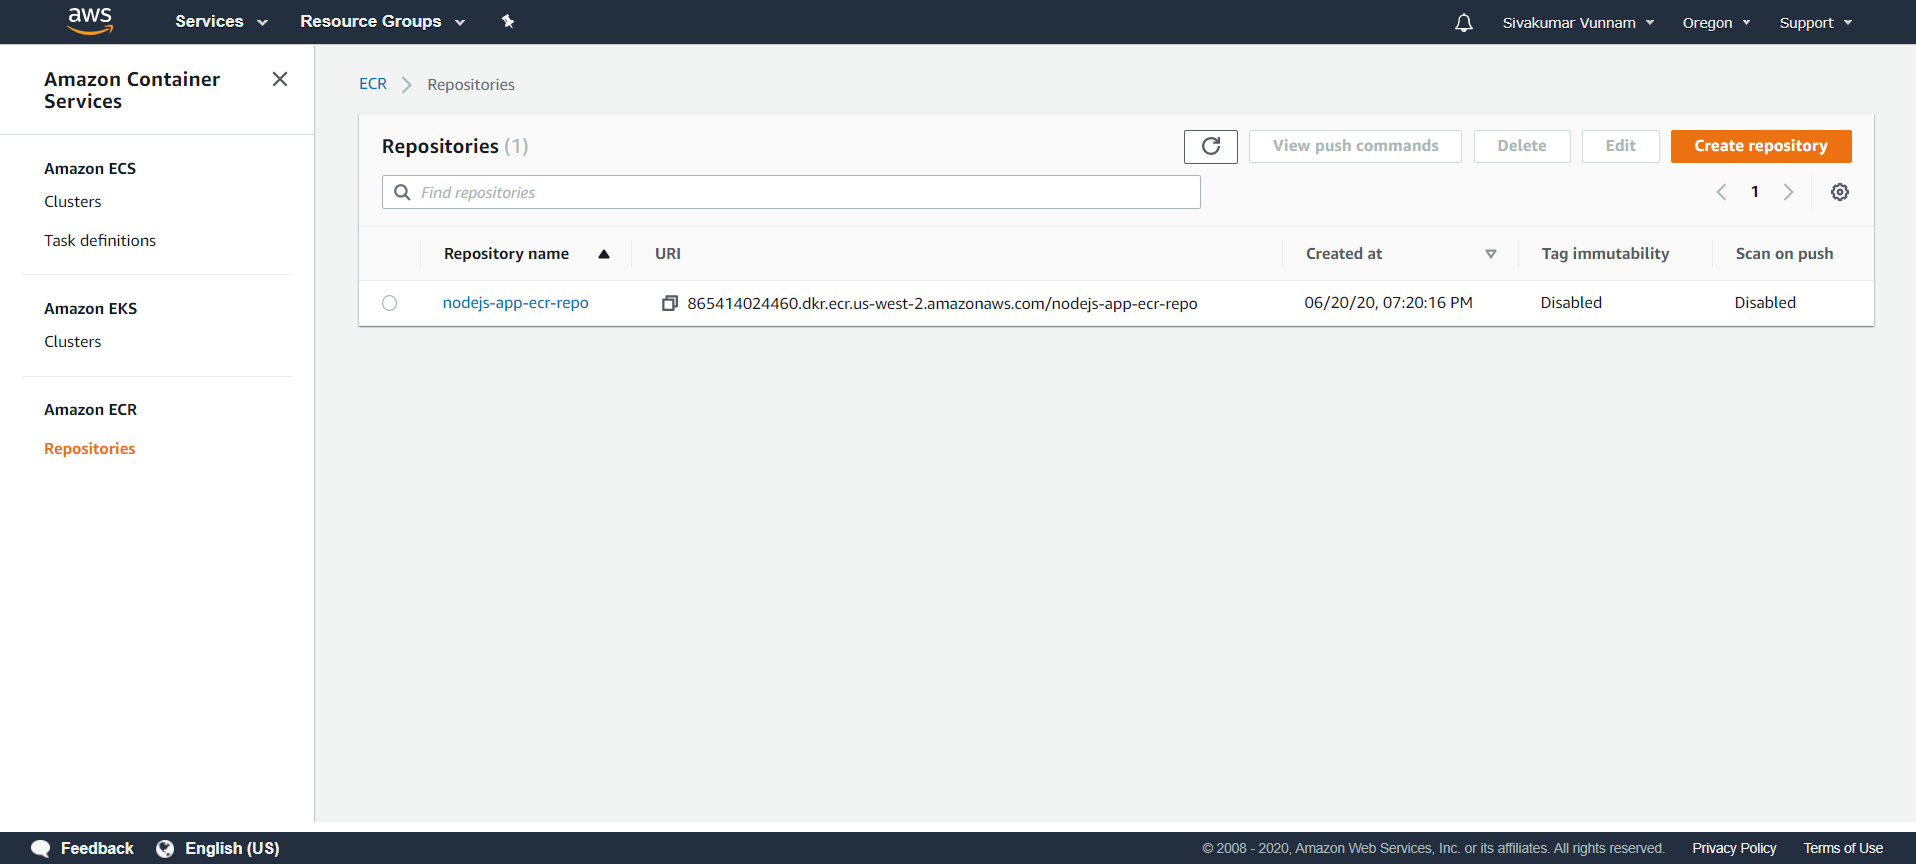
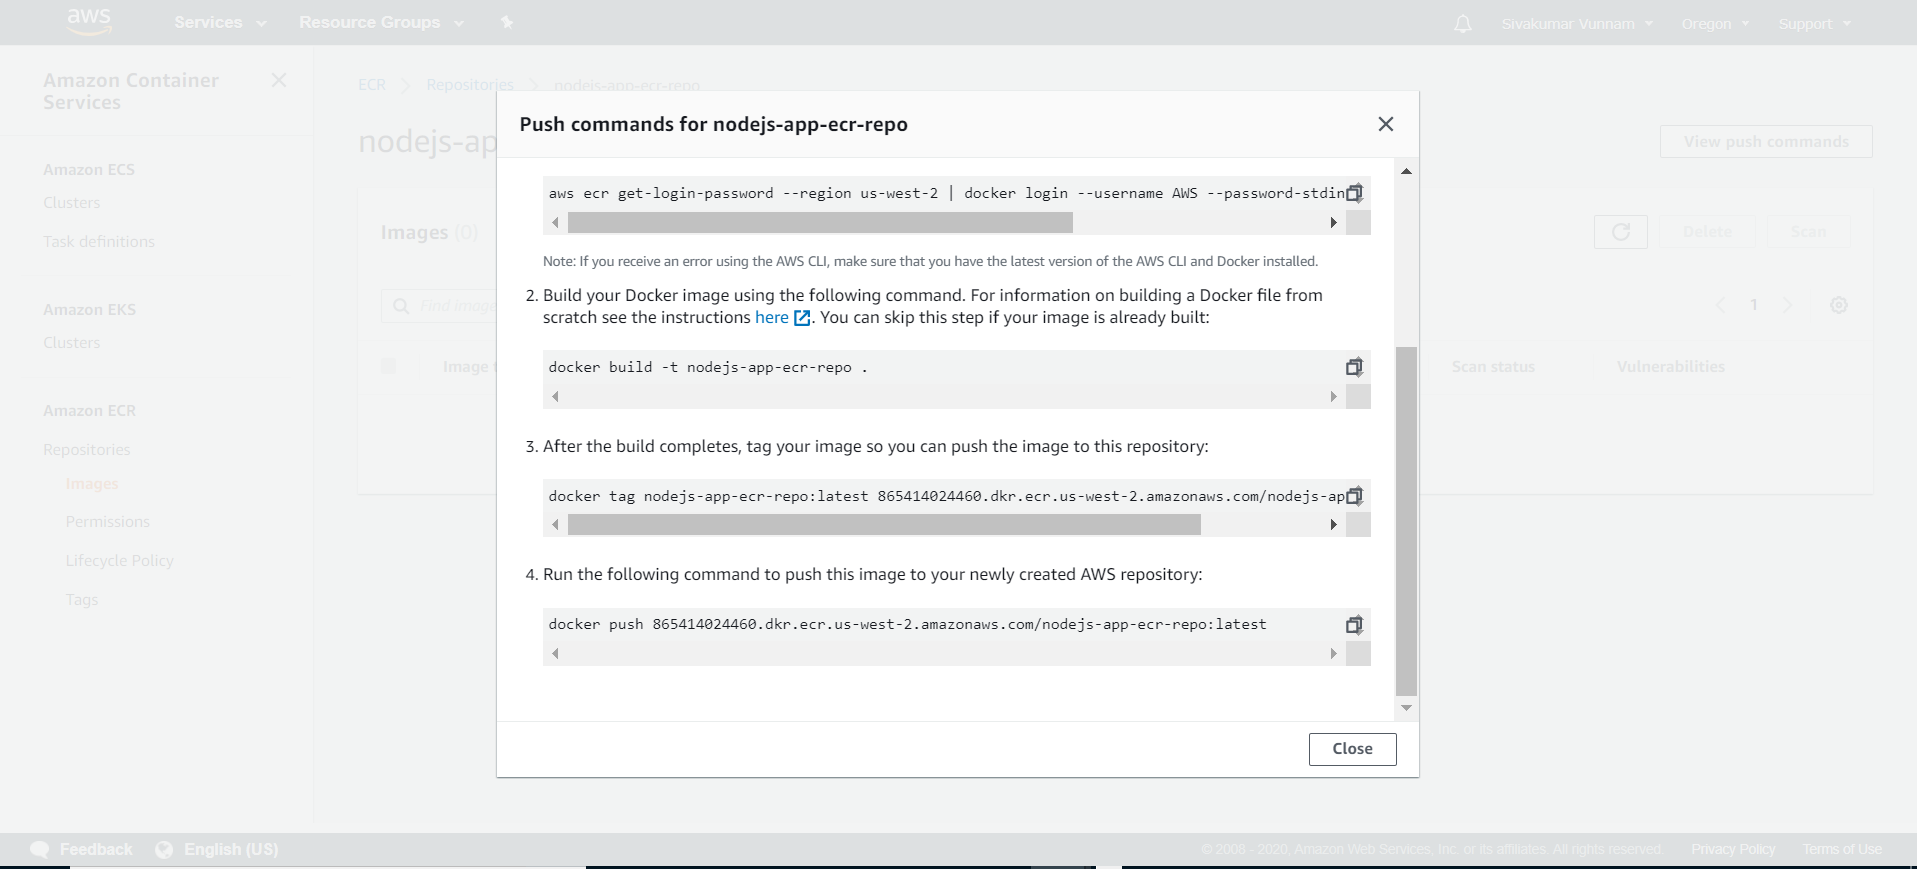
Now we can build and push our Node application image up to this repository. Click on the repository and click View push commands. A modal will appear with four commands you need to run locally in order to have your image pushed up to your repository:
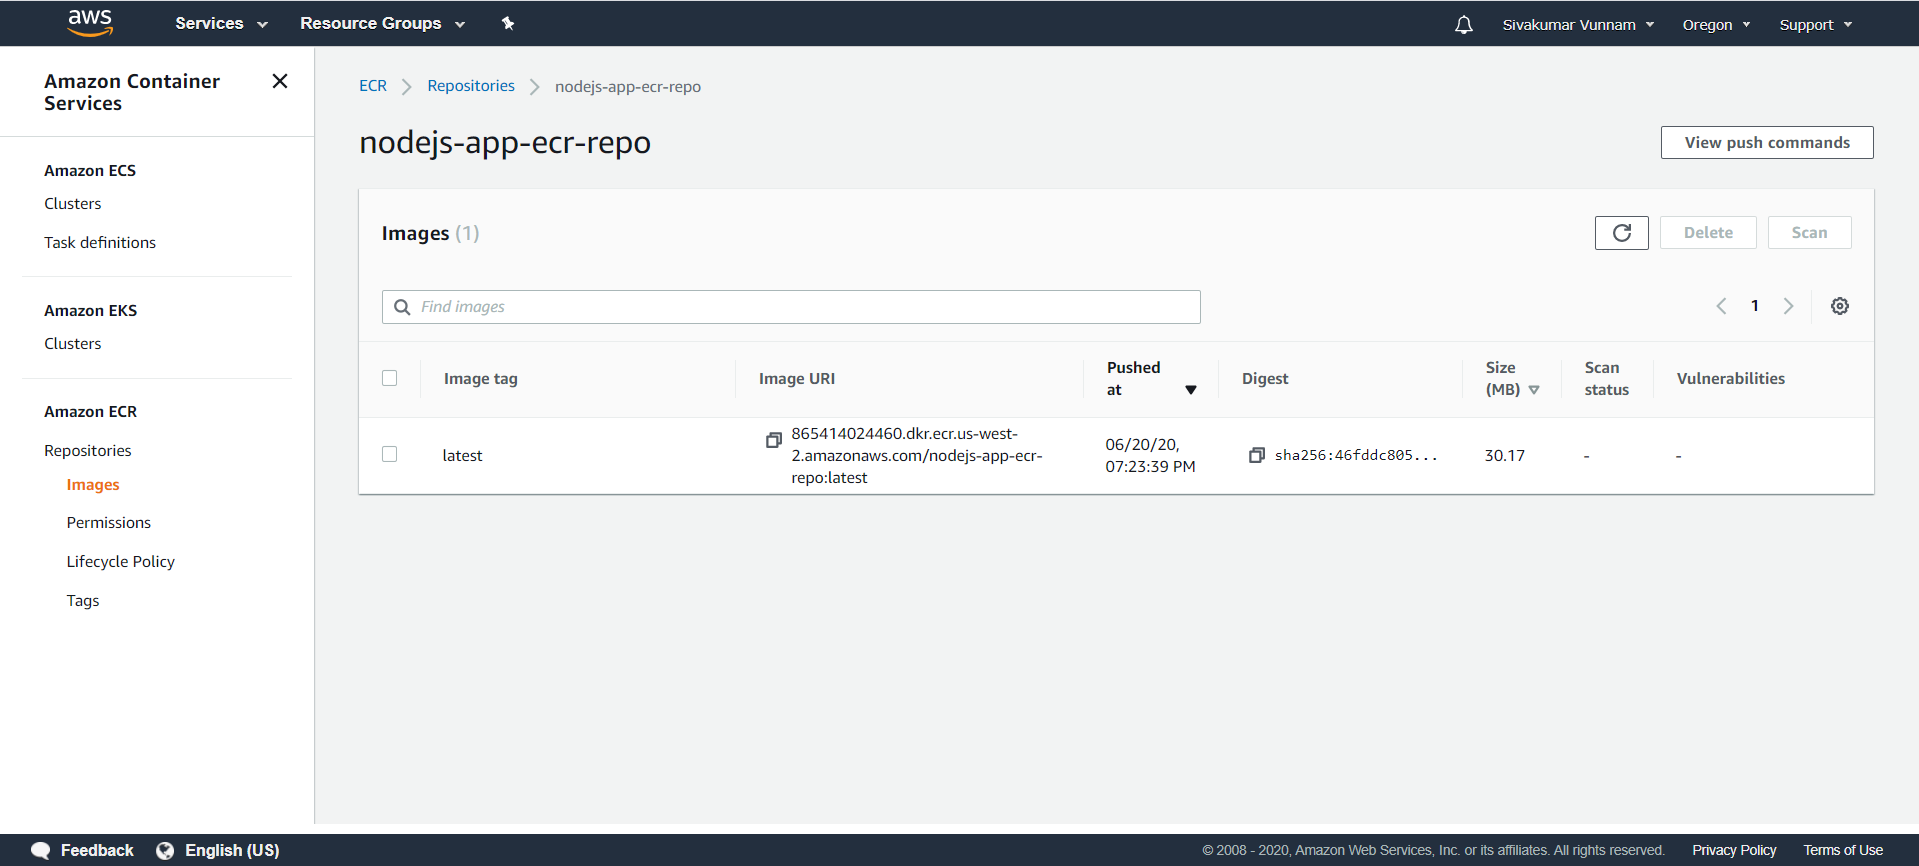
Once you have run these commands, you should see your pushed image in your repository:
Step 4. Create the ECS Cluster
ECS has three parts: clusters, services, and tasks.
Next, add this code to your terraform file and redeploy your infrastructure with terraform apply:
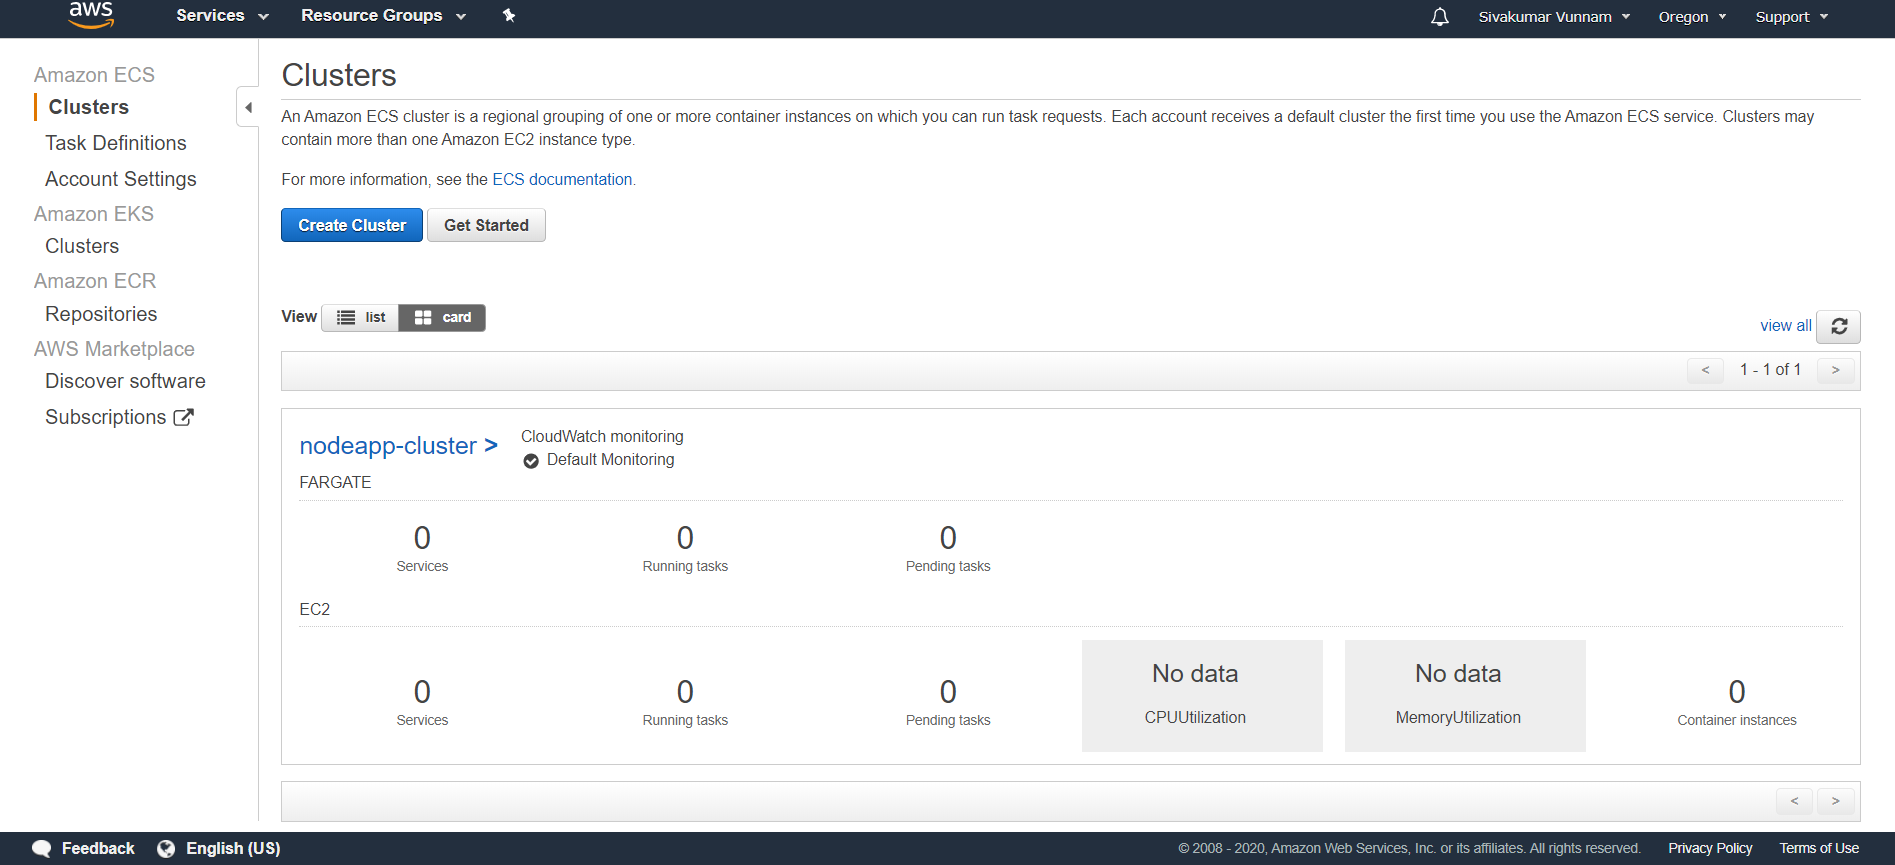
resource "aws_ecs_cluster" "nodejs-app_cluster" {
  name = "nodejs-app-cluster" # Naming the cluster
}
You should then see your new cluster:
Step 5. Create the First Task
Creating a task is a bit more involved than creating a cluster. Add the following commented code to your terraform script:
resource "aws_ecs_task_definition" "nodejs-app_task" {
  family                   = "nodejs-app-task" # Naming our task
  container_definitions    = <<DEFINITION
  [
    {
      "name": "nodejs-app-task",
      "image": "${aws_ecr_repository.nodejs-app_ecr_repo.repository_url}",
      "essential": true,
      "portMappings": [
        {
          "containerPort": 3000,
          "hostPort": 3000
        }
      ],
      "memory": 512,
      "cpu": 256
    }
  ]
  DEFINITION
  requires_compatibilities = ["FARGATE"] # Stating that we are using ECS Fargate
  network_mode             = "awsvpc"    # Using awsvpc as our network mode as this is required for Fargate
  memory                   = 512         # Specifying the memory our container requires
  cpu                      = 256         # Specifying the CPU our container requires
  execution_role_arn       = "${aws_iam_role.ecsTaskExecutionRole.arn}"
}

resource "aws_iam_role" "ecsTaskExecutionRole" {
  name               = "ecsTaskExecutionRole"
  assume_role_policy = "${data.aws_iam_policy_document.assume_role_policy.json}"
}

data "aws_iam_policy_document" "assume_role_policy" {
  statement {
    actions = ["sts:AssumeRole"]

    principals {
      type        = "Service"
      identifiers = ["ecs-tasks.amazonaws.com"]
    }
  }
}

resource "aws_iam_role_policy_attachment" "ecsTaskExecutionRole_policy" {
  role       = "${aws_iam_role.ecsTaskExecutionRole.name}"
  policy_arn = "arn:aws:iam::aws:policy/service-role/AmazonECSTaskExecutionRolePolicy"
}
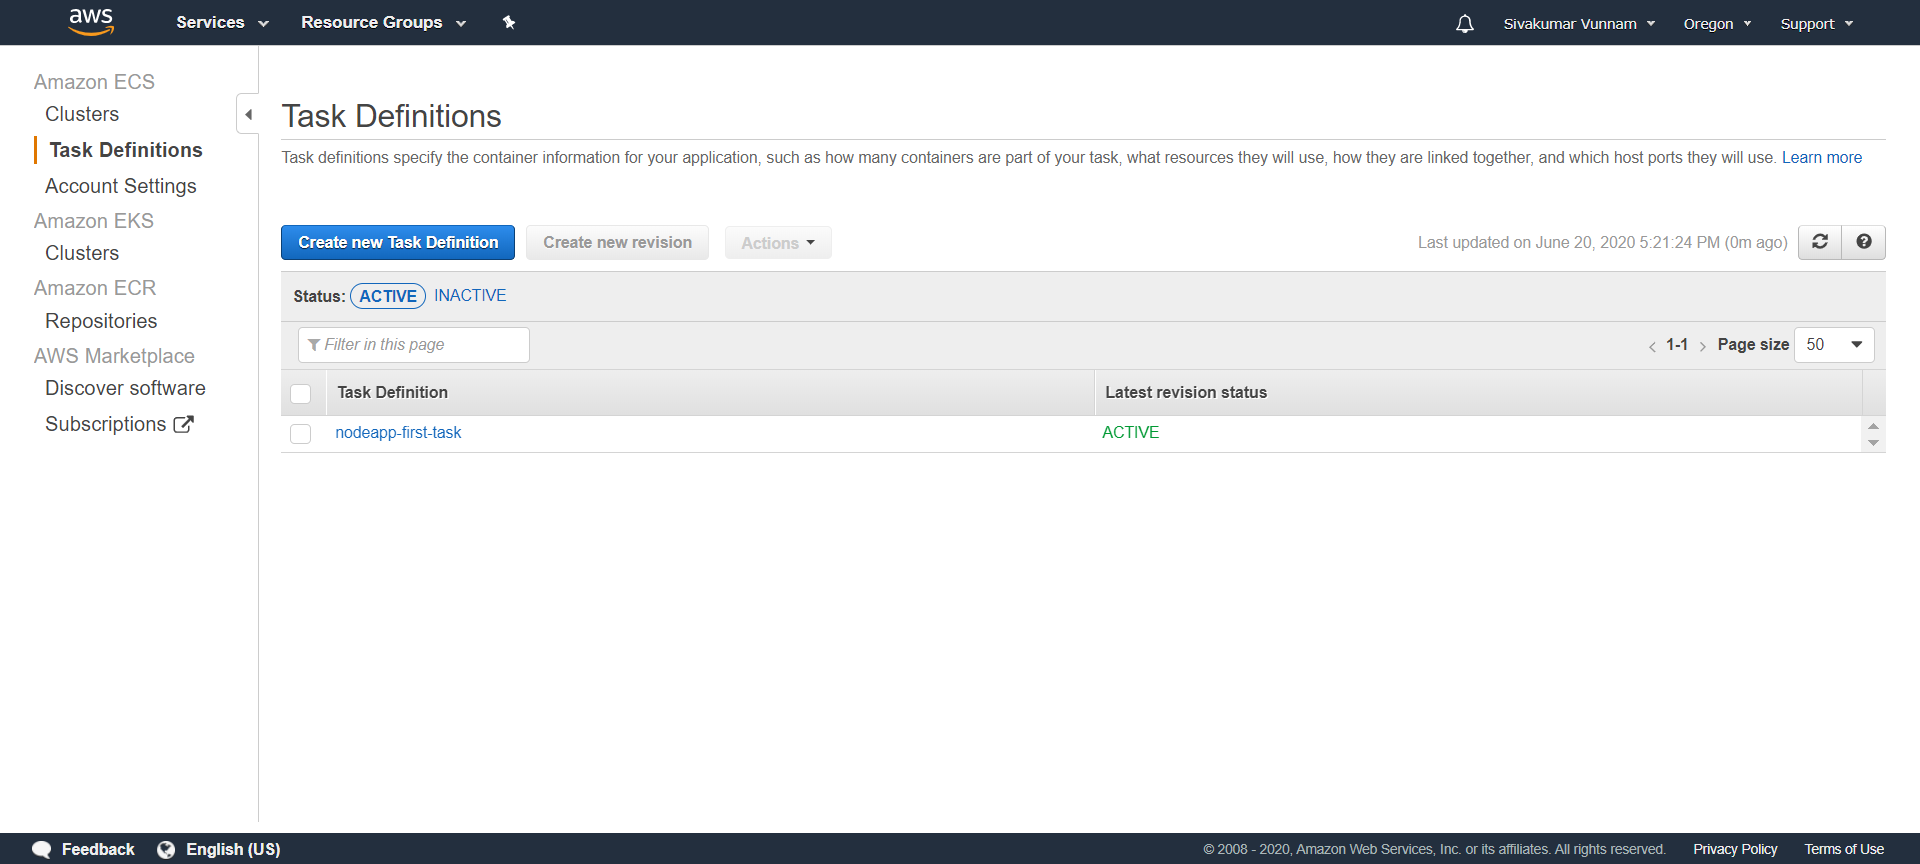
Notice how we specify the image by referencing the repository URL of our other terraform resource. Also notice how we provide the port mapping of 3000. We also create an IAM role so that tasks have the correct permissions to execute. If you click Task Definitions in AWS ECS, you should see your new task:
Step 6. Create the First Service
Now we have a cluster and a task definition. It is time that we spun up a few containers in our cluster through the creation of a service that will use our newly created task definition as a blueprint:
resource "aws_ecs_service" "nodejs-app_service" {
  name            = "nodejs-app-service"                             # Naming our service
  cluster         = "${aws_ecs_cluster.nodejs-app_cluster.id}"             # Referencing our created Cluster
  task_definition = "${aws_ecs_task_definition.nodejs-app_task.arn}" # Referencing the task our service will spin up
  launch_type     = "FARGATE"
  desired_count   = 3 # Setting the number of containers to 3

  load_balancer {
    target_group_arn = "${aws_lb_target_group.target_group.arn}" # Referencing our target group
    container_name   = "${aws_ecs_task_definition.nodejs-app_task.family}"
    container_port   = 3000 # Specifying the container port
  }

  network_configuration {
    subnets          = ["${aws_default_subnet.default_subnet_a.id}", "${aws_default_subnet.default_subnet_b.id}", "${aws_default_subnet.default_subnet_c.id}"]
    assign_public_ip = true                                                # Providing our containers with public IPs
    security_groups  = ["${aws_security_group.service_security_group.id}"] # Setting the security group
  }
}
As we are using Fargate, our tasks need to specify that the network mode is awsvpc. As a result, we need to extend our service to include a network configuration. You may have not known it yet, but our cluster was automatically deployed into your account’s default VPC. However, for a service, this needs to be explicitly stated, even if we wish to continue using the default VPC and subnets. First, we need to create reference resources to the default VPC and subnets so that they can be referenced by our other resources:
# Providing a reference to our default VPC
resource "aws_default_vpc" "default_vpc" {
}

# Providing a reference to our default subnets
resource "aws_default_subnet" "default_subnet_a" {
  availability_zone = "us-west-2a"
}

resource "aws_default_subnet" "default_subnet_b" {
  availability_zone = "us-west-2b"
}

resource "aws_default_subnet" "default_subnet_c" {
  availability_zone = "us-west-2c"
}
resource "aws_default_subnet" "default_subnet_d" {
  availability_zone = "us-west-2d"
}
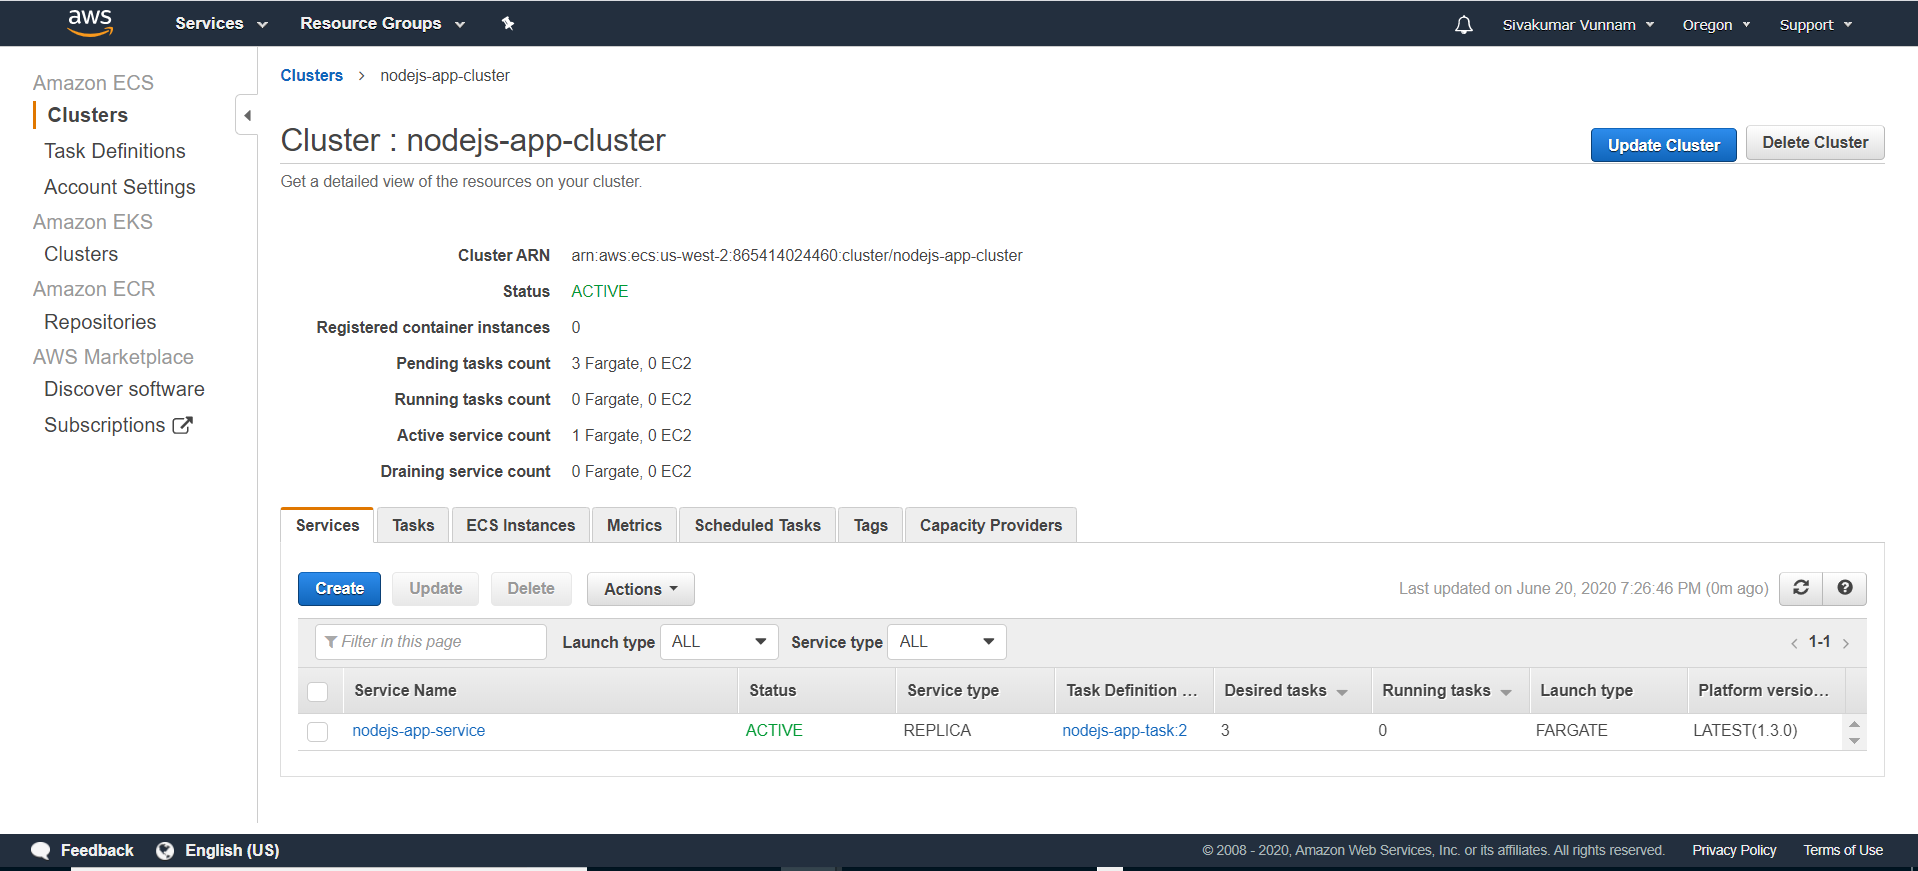
Once deployed, click on your cluster, and you should then see your service:
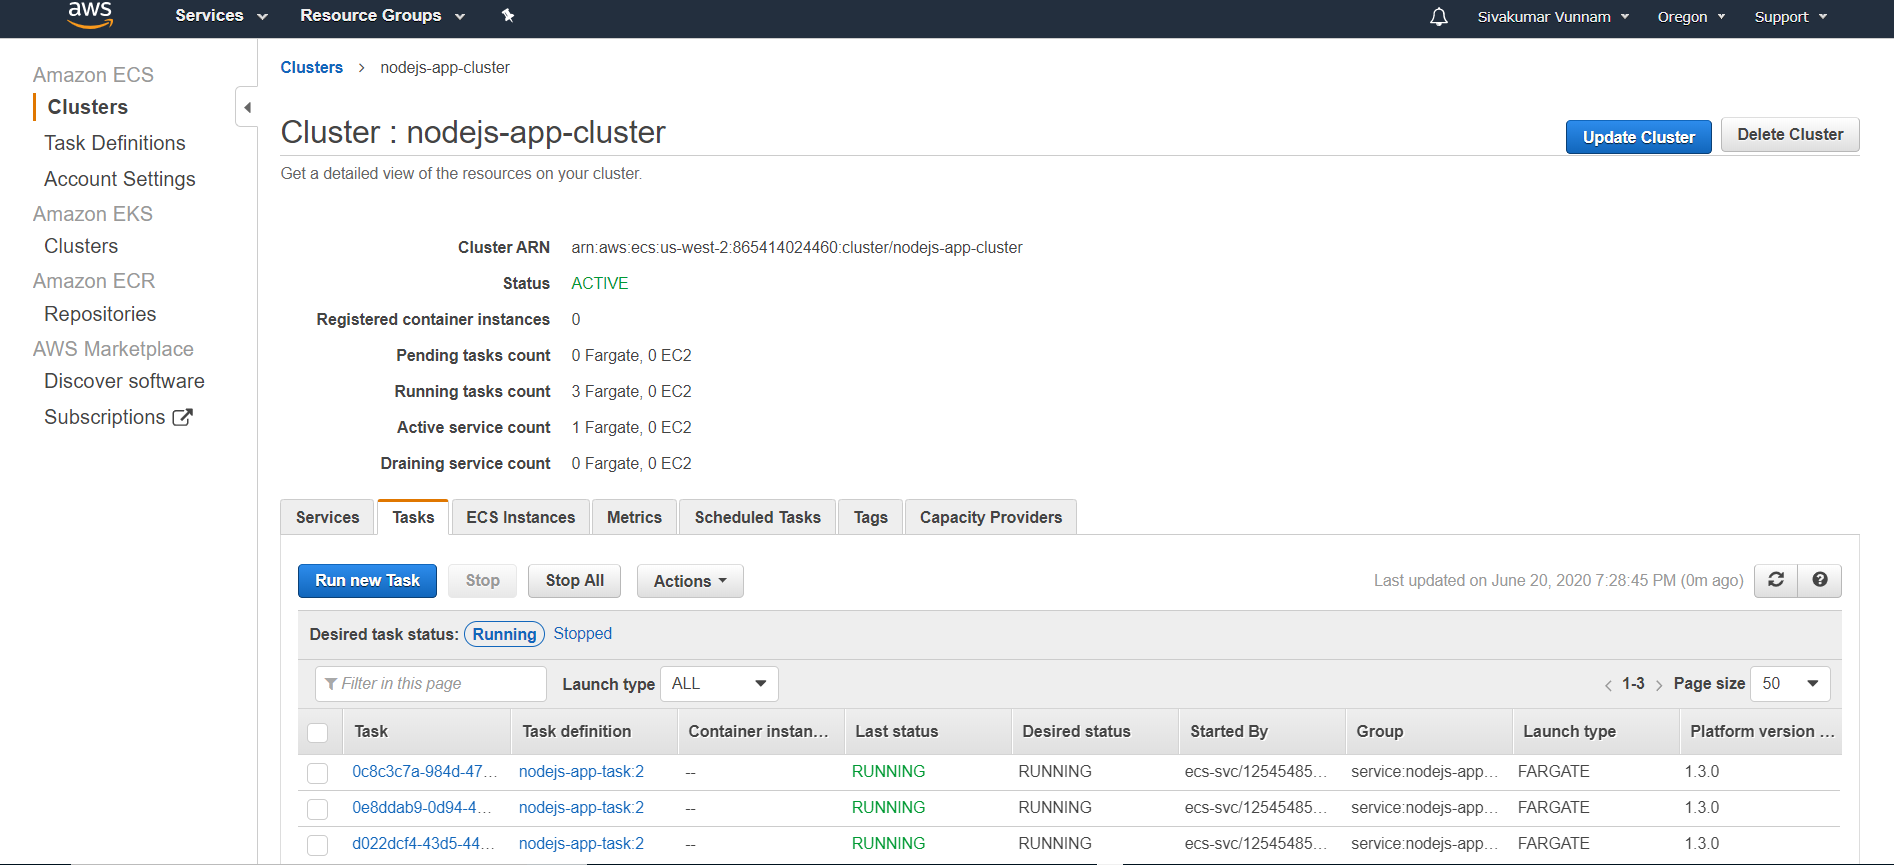
If you click on your service and the Tasks tab, you should also see that three tasks/containers have been spun up:
Step 7. Create a Load Balancer
The final step in this process is to create a load balancer through which we can access our containers. The idea is to have a single URL provided by our load balancer that, behind the scenes, will redirect our traffic to our underlying containers. Add the following commented terraform code:
resource "aws_alb" "application_load_balancer" {
  name               = "nodejs-app-lb-tf" # Naming our load balancer
  load_balancer_type = "application"
  subnets = [ # Referencing the default subnets
    "${aws_default_subnet.default_subnet_a.id}",
    "${aws_default_subnet.default_subnet_b.id}",
    "${aws_default_subnet.default_subnet_c.id}",
    "${aws_default_subnet.default_subnet_d.id}"
  ]
  # Referencing the security group
  security_groups = ["${aws_security_group.load_balancer_security_group.id}"]
}

# Creating a security group for the load balancer:
resource "aws_security_group" "load_balancer_security_group" {
  ingress {
    from_port   = 80
    to_port     = 80
    protocol    = "tcp"
    cidr_blocks = ["0.0.0.0/0"] # Allowing traffic in from all sources
  }

  egress {
    from_port   = 0
    to_port     = 0
    protocol    = "-1"
    cidr_blocks = ["0.0.0.0/0"]
  }
}
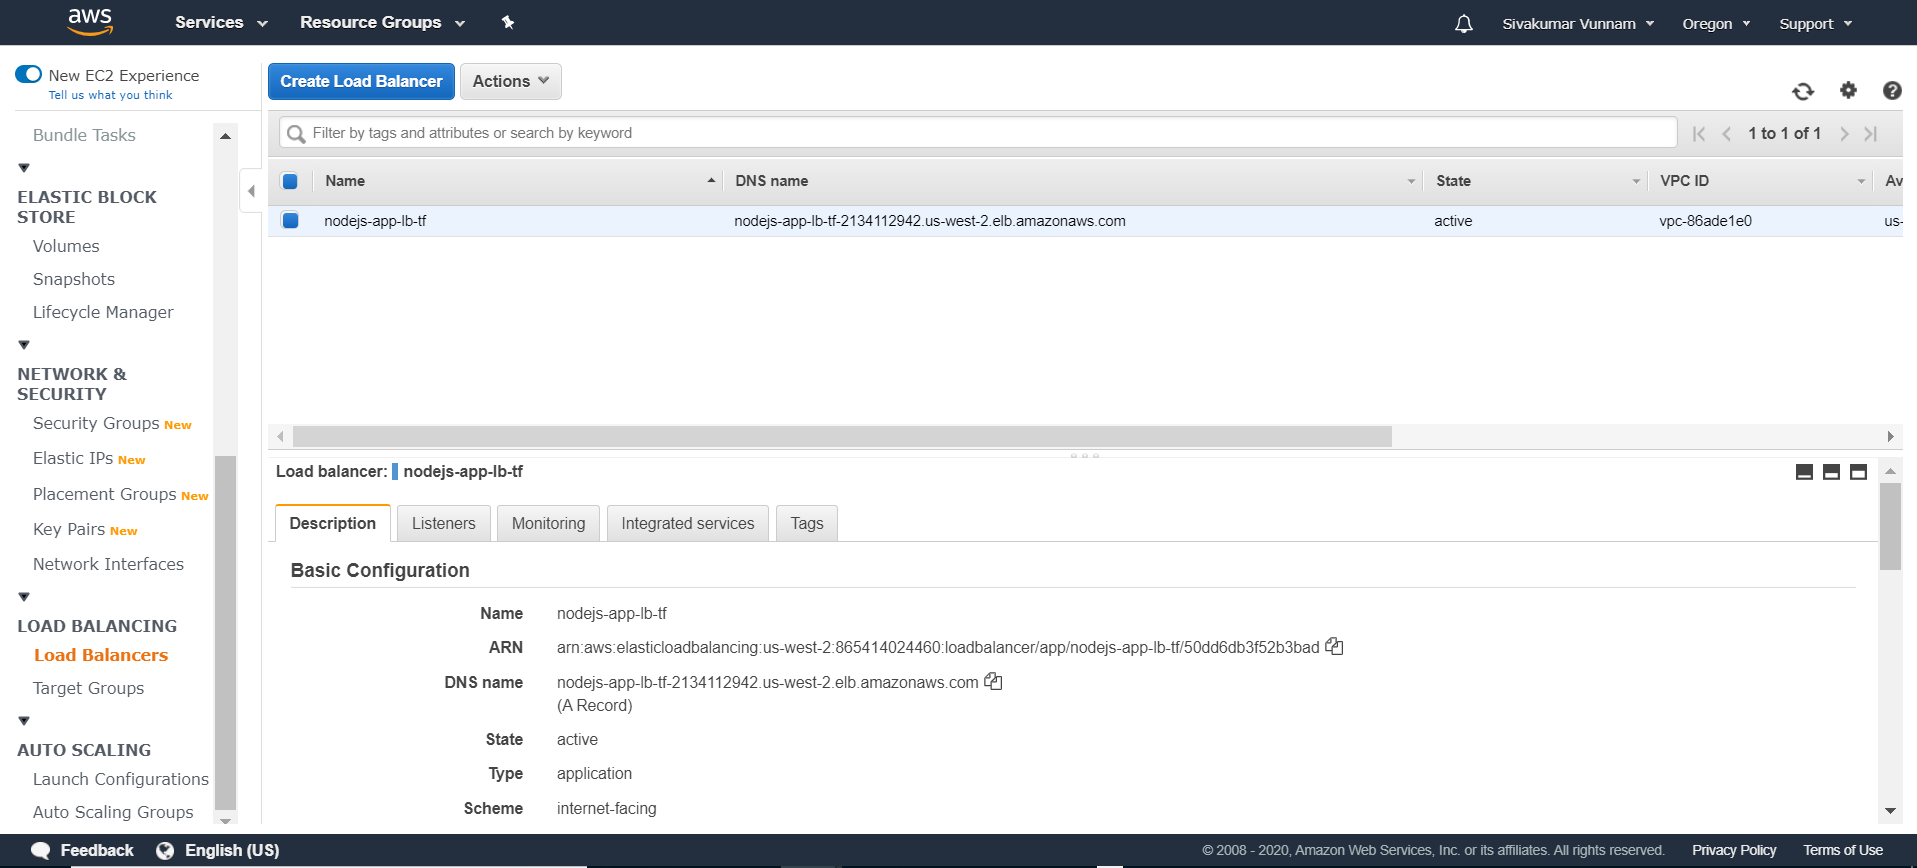
Note how we also create a security group for the load balancer. This security group is used to control the traffic allowed to and from the load balancer. If you deploy your code, navigate to EC2, and click Load balancers, you should see the following:
To direct traffic we need to create a target group and listener. Each target group is used to route requests to one or more registered targets (in our case, containers). When you create each listener rule, you specify a target group and conditions. Traffic is then forwarded to the corresponding target group. Create these with the following:
resource "aws_lb_target_group" "target_group" {
  name        = "target-group"
  port        = 80
  protocol    = "HTTP"
  target_type = "ip"
  vpc_id      = "${aws_default_vpc.default_vpc.id}" # Referencing the default VPC
}

resource "aws_lb_listener" "listener" {
  load_balancer_arn = "${aws_alb.application_load_balancer.arn}" # Referencing our load balancer
  port              = "80"
  protocol          = "HTTP"
  default_action {
    type             = "forward"
    target_group_arn = "${aws_lb_target_group.target_group.arn}" # Referencing our tagrte group
  }
}
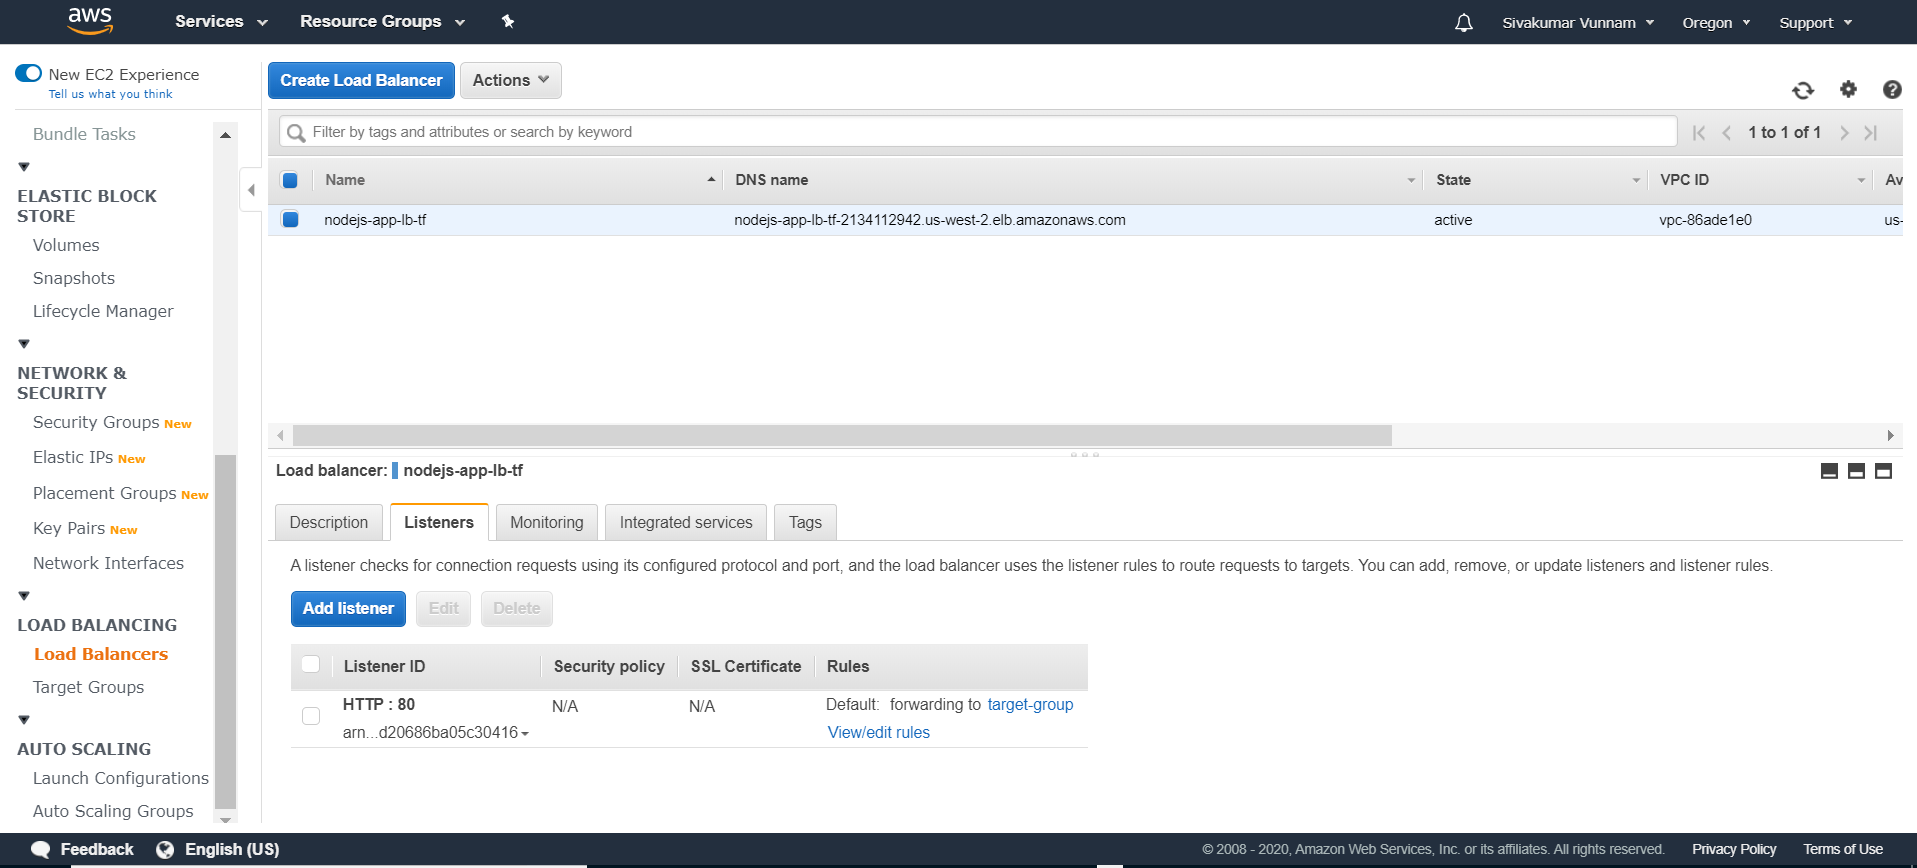
If you view the Listeners tab of your load balancer, you should see a listener that forwards traffic to your target group:
we have not linked our ECS service to our load balancer. We can change this by altering our service code to reference the targets:
resource "aws_ecs_service" "nodejs-app_service" {
  name            = "nodejs-app-service"                             # Naming our service
  cluster         = "${aws_ecs_cluster.nodejs-app_cluster.id}"             # Referencing our created Cluster
  task_definition = "${aws_ecs_task_definition.nodejs-app_task.arn}" # Referencing the task our service will spin up
  launch_type     = "FARGATE"
  desired_count   = 3 # Setting the number of containers to 3

  load_balancer {
    target_group_arn = "${aws_lb_target_group.target_group.arn}" # Referencing our target group
    container_name   = "${aws_ecs_task_definition.nodejs-app_task.family}"
    container_port   = 3000 # Specifying the container port
  }

  network_configuration {
    subnets          = ["${aws_default_subnet.default_subnet_a.id}", "${aws_default_subnet.default_subnet_b.id}", "${aws_default_subnet.default_subnet_c.id}"]
    assign_public_ip = true                                                # Providing our containers with public IPs
    security_groups  = ["${aws_security_group.service_security_group.id}"] # Setting the security group
  }
}


resource "aws_security_group" "service_security_group" {
  ingress {
    from_port = 0
    to_port   = 0
    protocol  = "-1"
    # Only allowing traffic in from the load balancer security group
    security_groups = ["${aws_security_group.load_balancer_security_group.id}"]
  }

  egress {
    from_port   = 0
    to_port     = 0
    protocol    = "-1"
    cidr_blocks = ["0.0.0.0/0"]
  }
}
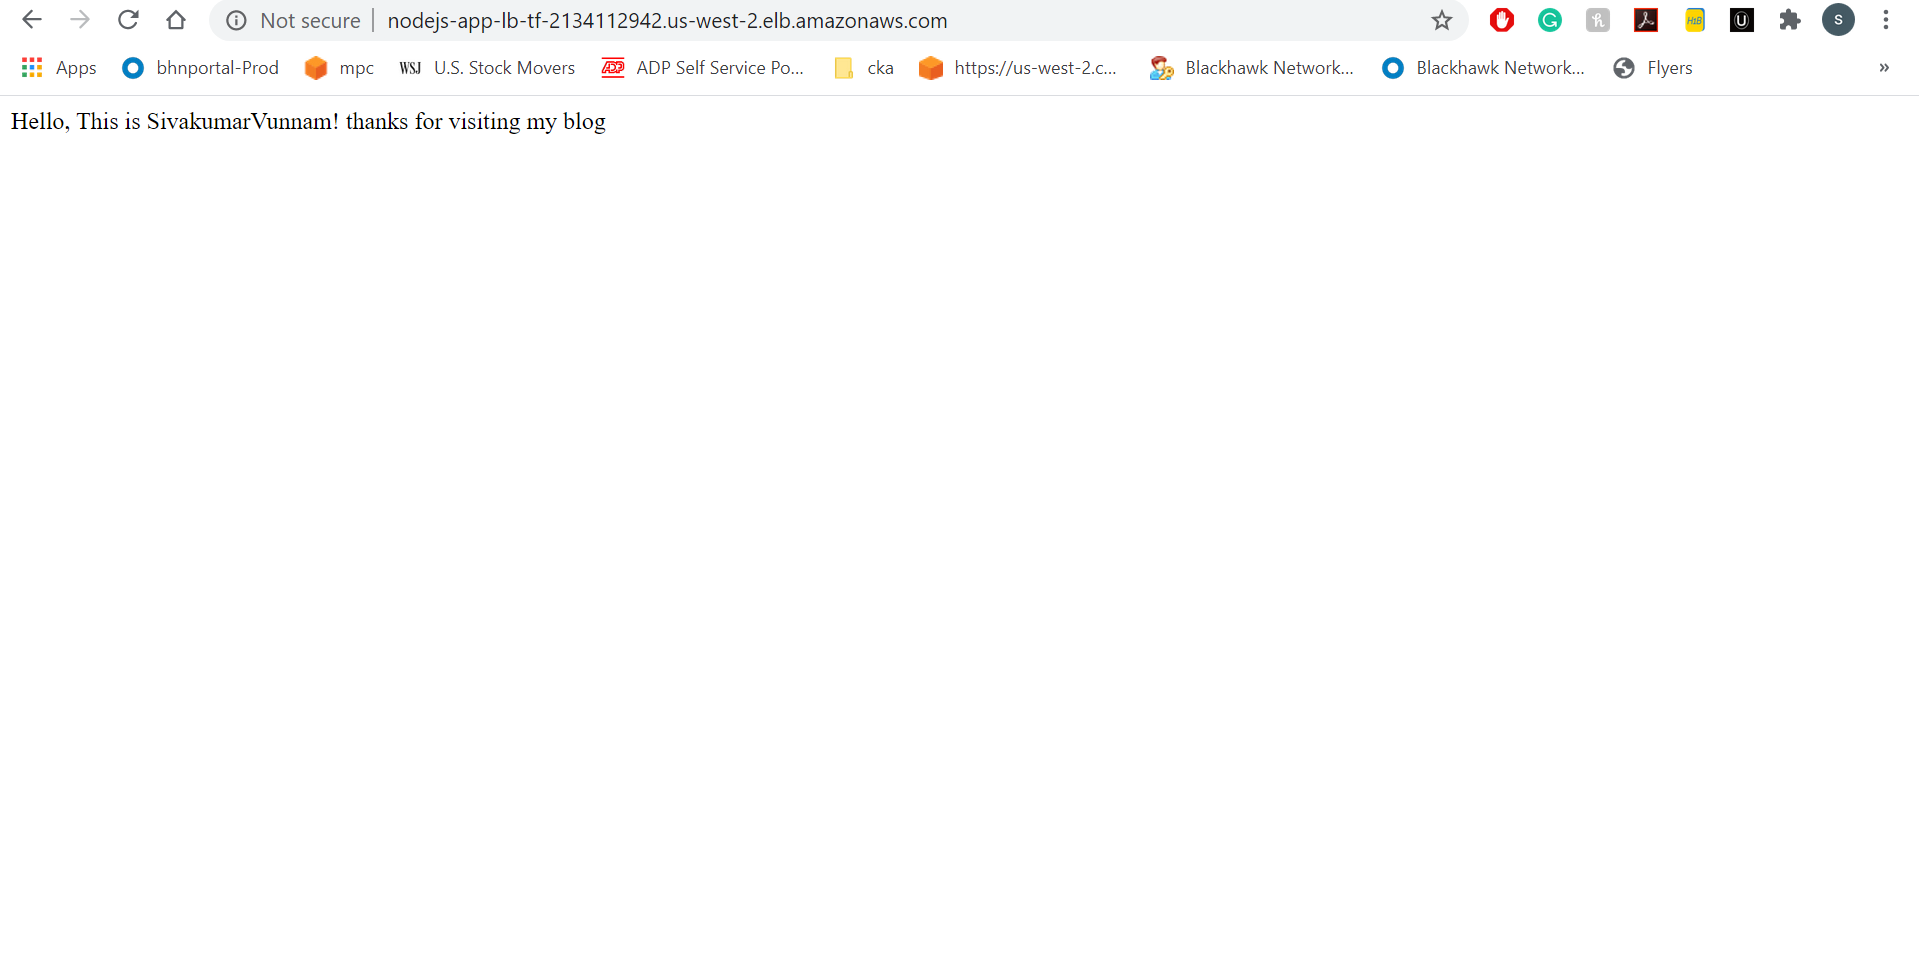
You should also be able to access your containers through your load balancer URL:
Conclusion
See the final code on (GitHub).